
I recently started a new Xamarin.Forms project. Being new to mobile development, I started by researching best practices for an “enterprise application.” By this, I mean I was looking for frameworks that support maintainability, testability, and generally encourage development best practices. While I’ve never created more than a “Hello World” application in Xamarin, I quickly learned about MVVM, and was reminded of some of the benefits of dependency injection.
After playing around with a couple frameworks, I settled on using Prism. Partly because of Miguel de Icaza’s recommendation, but also because of the following:
- It’s open source
- It has an active community:
- It has a full feature set, with the following built in:
NavigationService- Provides easy to use navigation between pages / modals, and standardizes the flow.PageDialogService- Removes the need to import another third party library just to do page dialogs, accross platforms.DependencyService- Allows you to pick the dependency injection framework of your choice as the basis for your app.
So what exactly is it?
Prism describes itself as the following:
Prism is a framework for building loosely coupled, maintainable, and testable XAML applications in WPF, Windows 10 UWP, and Xamarin Forms.
My understanding is that Prism is a library which was originally developed out of Microsoft, but in the last couple years was taken over by the open source community. And in fact, it was due to contributions that support was provided for Xamarin.Forms.
Personally, I think of Prism as the backbone of my application. It is the main framework, that helps shape my design decisions, and encourages me to follow established patterns and practices. I think the thing that I love the most about it, is the MVVM and dependency injection. While there are some conflicting views on dependency injection, so far, I have had a very positive experience. The core logic in my code is simpler, and easier to follow.
What’s it look like?
If you really want to get up and running quickly, try the Prism Template Pack for Visual Studio, which will do all the hard work for you, and give you a clean app that is ready to go. But where’s the fun in that? Instead, we are going to do this the old fashioned way, to better understand how the library works.
Create a new Xamarin.Forms project:
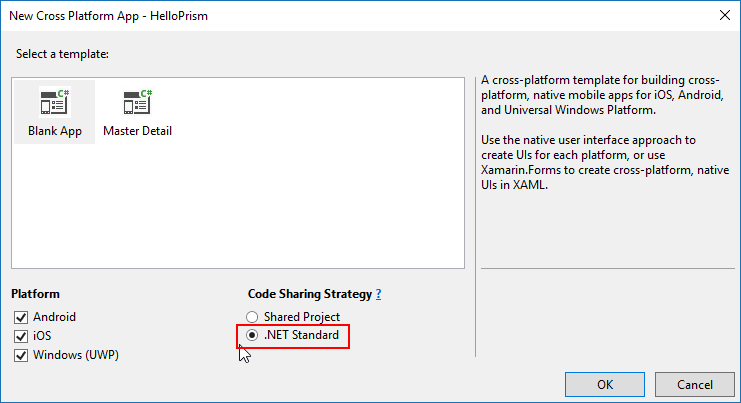 Definitely choose .NET Standard ;)
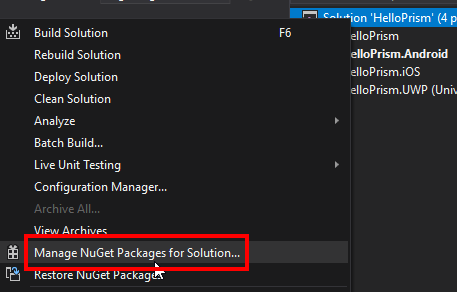
Right click on “Manage NuGet packages for Solution”:
Browse and add Prism.Unity.Forms to your solution:
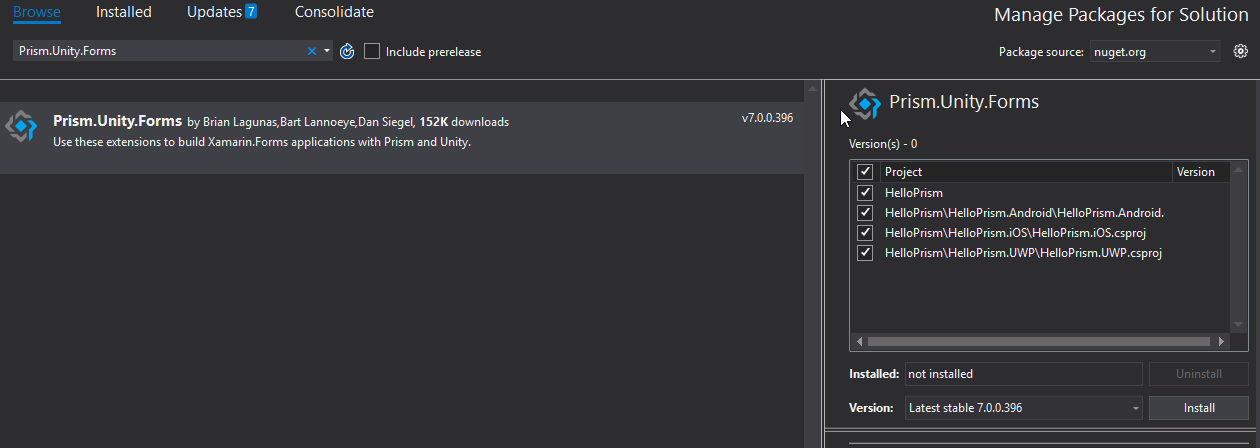
This will add the following packages to your solution:
Prism.CorePrism.FormsPrism.Unity.FormsUnity
It is worth mentioning that you have the option of the following dependency injection frameworks. I just happened to pick Unity, because of its ties to Microsoft:
Update App.Xaml.cs in the shared library:
- Inherit from
PrismApplicationinstead ofApplication
public partial class App : PrismApplication
- Replace the existing constructor, with the following:
public App() : this(null) { }
public App(IPlatformInitializer initializer) : base(initializer) { }
During runtime, your app will use the public App(IPlatformInitializer initializer) constructor, but the parameterless one is used to support the Xamarin.Forms Previewer.
- Implement the
abstractclass and add the following methods:
protected override void OnInitialized()
{
    InitializeComponent();
}

protected override void RegisterTypes(IContainerRegistry containerRegistry)
{
}
We will get back to the empty RegisterTypes method later.
Update App.xaml in the shared library:
- Add the Prism namespace within the opening xml node.
xmlns:prism="clr-namespace:Prism.Unity;assembly=Prism.Unity.Forms" - Rename the xml node to
prism: PrismApplication
It should now look like this:
<?xml version="1.0" encoding="utf-8" ?>
<prism:PrismApplication xmlns="http://xamarin.com/schemas/2014/forms"
            xmlns:x="http://schemas.microsoft.com/winfx/2009/xaml"
            xmlns:prism="clr-namespace:Prism.Unity;assembly=Prism.Unity.Forms"
            x:Class="HelloPrism.App">
</prism:PrismApplication>
Update iOS' AppDelegate.cs:
Add a new class called
iOSInitializerwhich inherits fromIPlatformInitializer. Remember when we added a constructor to theApp.Xaml.csfile which took anIPlatformInitializeras a parameter? Well, this is where we are going to call it from each platform. This class will be empty for the time being, but this is where you would register platform dependent objects. For instance, I have used this implement bluetooth functionality specific to each platform, or you could also unique pages.Change the
LoadApplicationcall toLoadApplication(new App(new iOSInitializer()));
The AppDelegate.cs should now look like this:
[Register(nameof(AppDelegate))]
public partial class AppDelegate : global::Xamarin.Forms.Platform.iOS.FormsApplicationDelegate
{
    public override bool FinishedLaunching(UIApplication app, NSDictionary options)
    {
        global::Xamarin.Forms.Forms.Init();
        LoadApplication(new App(new iOSInitializer()));

        return base.FinishedLaunching(app, options);
    }
}

public class iOSInitializer : IPlatformInitializer
{
    public void RegisterTypes(IContainerRegistry containerRegistry) { }
}
Update Android’s MainActivity.cs:
- Add a new class called
AndroidInitializer. This class will also be empty for the time being. - Update the
LoadApplicationcall toLoadApplication(new App(new AndroidInitializer()));.
The MainActivity.cs should now look like this:
public class MainActivity : global::Xamarin.Forms.Platform.Android.FormsAppCompatActivity
{
    protected override void OnCreate(Bundle bundle)
    {
        TabLayoutResource = Resource.Layout.Tabbar;
        ToolbarResource = Resource.Layout.Toolbar;

        base.OnCreate(bundle);

        global::Xamarin.Forms.Forms.Init(this, bundle);
        LoadApplication(new App(new AndroidInitializer()));
    }
}

public class AndroidInitializer : IPlatformInitializer
{
    public void RegisterTypes(IContainerRegistry containerRegistry) { }
}
Update UWP’s MainPage.Xaml.cs:
- You probably see the pattern now, but just for the sake of thoroughness, add a new class called
UwpInitializer. - Update the
LoadApplicationcall toLoadApplication(new HelloPrism.App(new UwpInitializer()));.
The MainPage.xaml.cs should now look like this:
public sealed partial class MainPage
{
    public MainPage()
    {
        this.InitializeComponent();

        LoadApplication(new HelloPrism.App(new UwpInitializer()));
    }
}

public class UwpInitializer : IPlatformInitializer
{
    public void RegisterTypes(IContainerRegistry containerRegistry) { }
}
Add a MainViewModel:
Now it’s finally time for some MVVM. Specifically, the “VM” part. Go ahead and create a new class called MainViewModel in the shared library. Make it abstract and implement BindableBase. Personally, I would make a ViewModelBase to provide base functionality for all of your view models, but for just getting started, this is probably OK to do in a one off instance.
We are going to add two properties to this class, one for the page title, and one for the label text that we want to display. All said and done, our class should look like this:
public class MainViewModel : BindableBase
{
    private string title;
    public string Title
    {
        get => this.title;
        set => SetProperty(ref this.title, value);
    }

    private string textForLabel;
    public string TextForLabel
    {
        get => this.textForLabel;
        set => SetProperty(ref this.textForLabel, value);
    }
}
Notice that we have backing fields, and our setters call SetProperty. This is a method on the BindableBase, which is responsible for notifying listeners that a value has changed. This allows us to dynamically update values, and have the UI updated accordingly. For more information on Xamarin.Forms bindings, check out this documentation.
Register a page for navigation
Go back to our App.xaml.cs page and add the following line to the RegisterTypes method.
containerRegistry.RegisterForNavigation<MainPage, MainViewModel>("Main");
Next we need to tell our app to navigate to this page on startup. Make the OnInitialized method async, and add the following line await this.NavigationService.NavigateAsync("Main");, after InitializeComponent();.
If you launch the app, you should see it work! But we havent actually bound any fields to our viewmodel yet.
Set the property values on the view model
Add a constructor to the MainViewModel and set the Title and TextForLabel properties that we previously created, to any value you like. Here is what mine looks like:
public MainViewModel()
{
    this.Title = "Main Page";
    this.TextForLabel = "This is some text";
}
Now update the label on the MainPage.xaml to use the binding in the view model. Change Welcome to Xamarin.Forms! to {Binding TextForLabel}. It should look like this all said and done:
<Label Text="{Binding TextForLabel}"
       VerticalOptions="Center"
       HorizontalOptions="Center" />
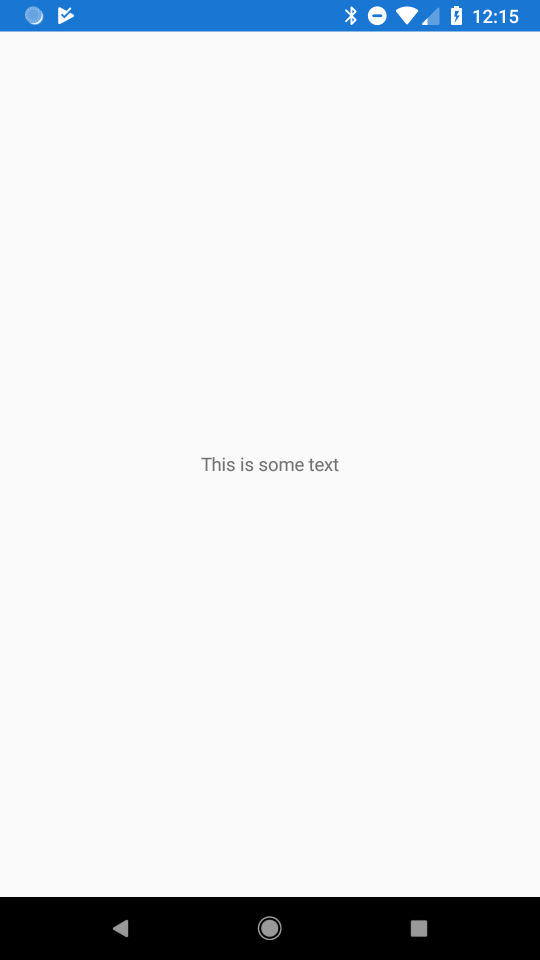
TA DA!
Now when you launch you app, you should see this:
Closing
I realize that grad finale wasn’t too exciting, but we really have done some cool stuff. This app is now a great template for a maintainable, testable, enterprise quality app. I will be writing more about my experience with Prism as I use it more, and hope to explain some of the more advanced features. If you have any questions, or want to know more about a particular piece, just let me know. Hit me up at @jtaubensee.
The code is available here.