
TabbedPages in mobile apps are probably something we are all familiar with. From a user’s point of view, they are a logical separation of ideas or tasks. I recently found myself needing to implement a TabbedPage using Xamarin.Forms and Prism, but I was doing something out of the ordinary. I needed to share context between both of my pages.
Basically, I wanted to allow users to input information in one of two ways. Either they could manually enter information with a keyboard, or use an onscreen keypad. In this post I will demonstrate something similar using a Stepper on one page, and a label on the second, displaying the value from the first page. The signigicance of this, is that I am using Prism’s default method to pass NavigationParameters, with the help of a custom behavior.
In case you need a background on Prism, see my previous blog post about getting started.
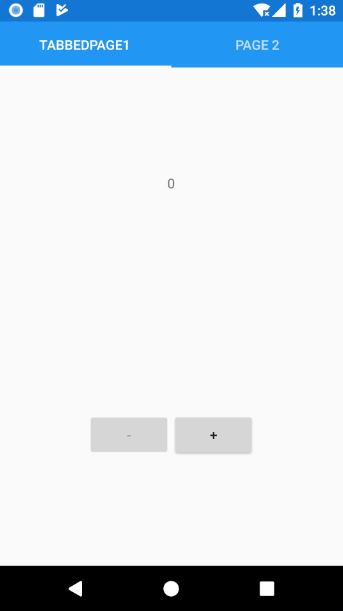
Here’s what things will look like:
So, really, it’s pretty simple. However, there are a couple of technical hurdles to overcome. Let’s get started:
Add a new MainTabbedPage to your solution
This will be our container page, which houses both of the views we want to have.
- Right click and add a new ContentPage to your application, called
MainTabbedPage. - Update the XAML tag to
TabbedPageinstead ofContentPage. You will also need to update the partial class definition in the code behind.
<TabbedPage xmlns="http://xamarin.com/schemas/2014/forms"
            xmlns:x="http://schemas.microsoft.com/winfx/2009/xaml"
            x:Class="PrismWithTabbedViews.Views.MainTabbedPage">
</TabbedPage>
- Register this page for navigation in the
App.xaml.csfile.
containerRegistry.RegisterForNavigation<MainTabbedPage>();
We are not going to add a ViewModel for this page, as there is not anything that we need to bind it to.
Add ViewModels for both child views
- Create a new class called
TabbedPage1ViewModel.cs. - Add a
privatefield andpublicproperty for theCounterValue.
private double counterValue = 0;
public double CounterValue
{
    get => this.counterValue;
    set => SetProperty(ref this.counterValue, value);
}
I am using a base view model which inherits from BindableBase and INavigationAware. The BindableBase implements INotifyPropertyChanged, and gives us the method SetProperty, which you see above.
In case you have not used NavigationProperties with Prism yet, give this a quick read. They allow you to pass objects and parameters between views. We will implement the INavigationAware interface which allows us to receive and send parameters. I have implmented this in my base class, but in case you don’t want to do that, you can implement this on each ViewModel that needs it.
- Override or implement
OnNavigatedFrom:
public void OnNavigatedFrom(NavigationParameters parameters)
{
    parameters.Add(nameof(this.CounterValue), this.CounterValue);
}
Here, we are setting a parameter with the value of the counter that we want to pass. So everytime we navigate away from this page, we will set this parameter in case the next page wants to use it.
- Override or implment
OnNavigatedTo:
public void OnNavigatedTo(NavigationParameters parameters)
{
    if (parameters.TryGetValue<double>(nameof(this.CounterValue), out var newCounterValue))
    {
        this.CounterValue = newCounterValue;
    }
}
And here, we are setting our bindable property to the value in the NavigationParameters, if present.
- Repeat for the second view model. For the sake of simplicity, we are just going to duplicate the code on the second view model. If I was implementing this in the real world, I would actually create another base view model for these two classes to share.
Add two new views
- Add a new
TabbedPageView1ContentPage, and change the content to be this:
<ContentPage.Content>
    <StackLayout>
        <Label Text="{Binding CounterValue}"
            VerticalOptions="CenterAndExpand"
            HorizontalOptions="CenterAndExpand" />
        <Stepper
            Minimum="0"
            Maximum="1000"
            Increment="1"
            Value="{Binding CounterValue}"
            VerticalOptions="CenterAndExpand"
            HorizontalOptions="CenterAndExpand" />
    </StackLayout>
</ContentPage.Content>
- Add a new
TabbedPageView2ContentPage, and change the content to be this:
<ContentPage.Content>
    <StackLayout>
        <Label Text="{Binding CounterValue}"
            VerticalOptions="CenterAndExpand"
            HorizontalOptions="CenterAndExpand" />
    </StackLayout>
</ContentPage.Content>
- Register the two pages above for navigation in the
App.xaml.cs:
containerRegistry.RegisterForNavigation<TabbedPage1, TabbedPage1ViewModel>();
containerRegistry.RegisterForNavigation<TabbedPage2, TabbedPage2ViewModel>();
Create a new custom behavior
When you move from one tab to the other, this is not actually a navigation event. Therfore, the OnNavigatedTo and OnNavigatedFrom are never actually called. But wait, why did we just implement them then? Because we can create a new behavior to call these when the TabbedPage changes tabs. Thanks to Dan Siegel for pointing me in the right direction on this one.
- Create a new class called
TabbedPageNavigationBehavior.cs. - Create a private field to track the current page:
private Page CurrentPage;
- Create a new method like the following:
private void OnCurrentPageChanged(object sender, EventArgs e)
{
    var newPage = this.AssociatedObject.CurrentPage;

    if (this.CurrentPage != null)
    {
        var parameters = new NavigationParameters();
        PageUtilities.OnNavigatedFrom(this.CurrentPage, parameters);
        PageUtilities.OnNavigatedTo(newPage, parameters);
    }

    this.CurrentPage = newPage;
}
This method will be called when the CurrentPageChanged event occurs. In here, we are setting the new page which we are navigating to, to our local variable. Also if the current page is not null, we manually call the OnNavigatedFrom method on the previous page, and the OnNavigatedTo on the new page.
- Override
OnAttachedToandOnDetachingFromlike the following:
protected override void OnAttachedTo(TabbedPage bindable)
{
    bindable.CurrentPageChanged += this.OnCurrentPageChanged;
    base.OnAttachedTo(bindable);
}

protected override void OnDetachingFrom(TabbedPage bindable)
{
    bindable.CurrentPageChanged -= this.OnCurrentPageChanged;
    base.OnDetachingFrom(bindable);
}
These will simply register and unregister our event handler according to the tabbed page’s lifecycle.
Update the MainTabbedPage view
- Add the following namespace declarations:
xmlns:local="clr-namespace:PrismWithTabbedViews.Views"
xmlns:behaviors="clr-namespace:PrismWithTabbedViews.Behaviors"
- Add a
<TabbedPage.Children>node with our child views:
<TabbedPage.Children>
    <local:TabbedPage1 />
    <local:TabbedPage2 />
</TabbedPage.Children>
- Register the behavior that we just created:
<TabbedPage.Behaviors>
    <behaviors:TabbedPageNavigationBehavior />
</TabbedPage.Behaviors>
The MainTabbedPage.xaml should now look like this:
<?xml version="1.0" encoding="utf-8" ?>
<TabbedPage xmlns="http://xamarin.com/schemas/2014/forms"
            xmlns:x="http://schemas.microsoft.com/winfx/2009/xaml"
            xmlns:local="clr-namespace:PrismWithTabbedViews.Views"
            xmlns:behaviors="clr-namespace:PrismWithTabbedViews.Behaviors"
            x:Class="PrismWithTabbedViews.Views.MainTabbedPage">

    <TabbedPage.Behaviors>
        <behaviors:TabbedPageNavigationBehavior />
    </TabbedPage.Behaviors>
    <TabbedPage.Children>
        <local:TabbedPage1 />
        <local:TabbedPage2 />
    </TabbedPage.Children>
</TabbedPage>
And that should be it. If you run your application you should see the .gif at the top of this post.
Here is a link to the full code: https://github.com/jtaubensee/PrismWithTabbedViews
I hope this is helpful, and as always let me know if you have any questions. @jtaubensee